Friday, December 31, 2010
Friday, December 24, 2010
Wednesday, December 22, 2010
New HDR sharpening techinique
Sunday, December 19, 2010
Saturday, December 18, 2010
Friday, December 17, 2010
Tuesday, December 14, 2010
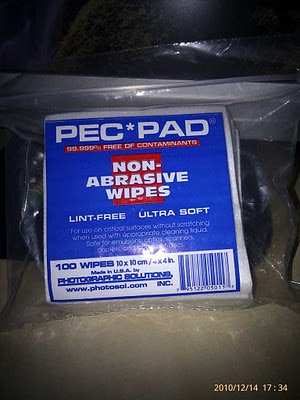
Pec Pads
These are bloody brilliant. I bought them from Amazon.uk the other day. I've been having a few problems cleaning my Skynyx camera recently using cotton buds, they always leave dust bunnies behind. I found these on a camera cleaning site and they work an absolute treat.

Sunday, December 12, 2010
Thursday, December 09, 2010
Wednesday, December 08, 2010
Monday, December 06, 2010
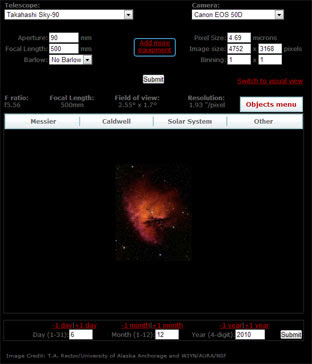
FOV calculator
This is nice, I've seen other versions that you can download, but this is a website. It has loads of scopes and cameras for both visual and imaging. Neat!
FOV Calculator
FOV Calculator

Thursday, December 02, 2010
Cassini - back online.
Nice to see images from Cassini again.
N00165288.jpg was taken on November 30, 2010 and received on Earth December 01, 2010. The camera was pointing toward ENCELADUS at approximately 88,882 kilometers away, and the image was taken using the CL1 and CL2 filters. This image has not been validated or calibrated.
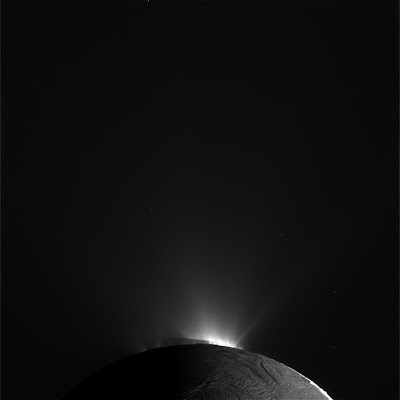
Image Credit: NASA/JPL/Space Science Institute
N00165288.jpg was taken on November 30, 2010 and received on Earth December 01, 2010. The camera was pointing toward ENCELADUS at approximately 88,882 kilometers away, and the image was taken using the CL1 and CL2 filters. This image has not been validated or calibrated.

Image Credit: NASA/JPL/Space Science Institute
Sunday, November 28, 2010
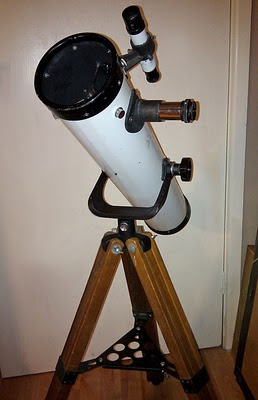
My first telescope.
I've been cleaning up my old scope for one of my grandchildren to use. It's a 3" reflector of unknown make (label fell of years ago).
It's a bit bashed about but it still works.
He-he, I say my first scope, I've only ever owned three, and two of them I bought within the last 5 years.
Here is the first image that I took with it at the start of this blog, before I got my main scope that I use now.
Not bad for a scope that is nearly 50 years old!

Saturday, November 27, 2010
Casting giant shadows - LRO.
The eastern inner wall of the farside crater Moore F.
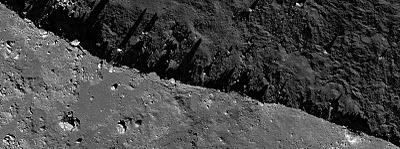
Credit [NASA/GSFC/Arizona State University].
The original TIFF file was 330Mb!
Idea from LPOD.

Credit [NASA/GSFC/Arizona State University].
The original TIFF file was 330Mb!
Idea from LPOD.
Friday, November 26, 2010
Monday, November 22, 2010
M45 again, more subs.
Friday, November 19, 2010
Thursday, November 04, 2010
Wednesday, November 03, 2010
Sunday, October 31, 2010
Mars rover Spirit: Sol 2001
It's still cloudy outside... so lets process some MER images from old.
This is my artistic version of a collection of images taken by the Spirit rover on Sol 2001. Using CS5 for stitching and the Sun flare.
From an idea by Marscat.

Love these rocks:-
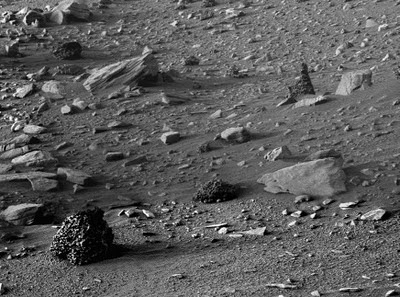
Credit JPL.
This is my artistic version of a collection of images taken by the Spirit rover on Sol 2001. Using CS5 for stitching and the Sun flare.
From an idea by Marscat.

Love these rocks:-

Credit JPL.
For info: All-Star polar alignment (All-Star) on CGE mount.
A lot of people ask this question... so here's the answer, blagged from Celestron.
(I can now point them here)
All-Star polar alignment (All-Star) allows users to choose any bright star for polar alignment, freeing you from always having to use Polaris for this purpose.
In a nutshell, here's how it works.
Once your telescope is aligned using two bright stars, All-Star allows you to choose any bright star listed in the NexStar hand control to accurately align your scope's mount with the North Celestial Pole (NCP). You command the scope to GOTO the star. Choosing ALIGN MOUNT, the scope then re-slews to it. You tweak the position in your finderscope, press ENTER, then center the star in the eyepiece and press ALIGN. Once centered, the mount will actually “sync” to this star, pointing the telescope to the exact position of the star if the mount were precisely polar aligned. By simply adjusting your mount’s altitude and azimuth controls to re-center the star in your eyepiece, you are actually moving the mount’s polar axis to the exact position of the NCP.
Here are the steps for the actual All-Star procedure. (Before doing this, be sure you’ve roughly pointed your scope’s polar axis north and tilted it at an angle approximately equal to your observing site’s latitude.)
First, align your telescope with the sky using the Two-Star Alignment method. Add one or more calibration stars.
(NOTE: For the most accurate alignment, use a reticle or crosshairs eyepiece to precisely center the star in your field of view.)
Second, select a suitable bright star from the hand control's database and slew the scope to the star.
Third, press the ALIGN button and select POLAR ALIGN – ALIGN MOUNT from the list. (A warning will appear about choosing proper stars for the All-Star.) Press ENTER.
Fourth, your scope will then re-slew to the alignment star and ask you to center it in the finderscope. Do this and press ENTER. Then repeat with the eyepiece, centering and pressing ALIGN to finish syncing on the star. (The hand control will display a sync message.) Press ENTER.
Fifth, the scope will slew to the position where the star would be if it were accurately polar aligned.
Sixth, use your mount’s altitude and azimuth fine adjustments to place the star in the center of the eyepiece and press ENTER.
The All-Star polar alignment is now complete.
Here are additional tips and techniques to use with All-Star.
Don’t use Polaris for polar alignment. Choose a star farther away from the NCP, allowing for greater accuracy when centering the star in your eyepiece. For best results choose a polar alignment star that is high in the sky and near the meridian and celestial equator. Avoid stars that are close to the western or eastern horizon, directly overhead or too near the celestial poles.
You may want to re-align the mount after All-Star polar alignment. The mount will retain its alignment; however, accuracy may have been compromised depending on how much the mount has been moved during polar alignment. Although the telescope’s tracking may be very good, pointing accuracy may need improvement, especially if you are trying to locate small objects on a CCD chip.
To update the alignment:
Undo the sync by pressing ALIGN, then selecting UNDO SYNC from the list of options. Press ENTER and the hand control will confirm the undo sync by displaying COMPLETE.
Next, slew the telescope to one of the original alignment stars, or another bright star if the original alignment stars are no longer in a convenient location. Press the ALIGN button and select ALIGNMENT STARS from the list. The hand control will prompt you to replace one of the original alignment stars. Make your choice and press ENTER. Do the usual, centering the star in the finder and pressing ENTER, then centering in the eyepiece and pressing ALIGN.
Repeat the process on a second alignment star.
For the best all-sky pointing accuracy, align on at least one additional calibration star. To add calibration stars, slew the telescope to a bright star on the opposite of the meridian from your two alignment stars. Press ALIGN and use the Up/Down buttons on the hand controller to select CALIBRATION STARS and press ENTER. Align each calibration star as usual in the finder and then the eyepiece.
If you want to know the accuracy of your mount’s polar alignment, press ALIGN – DISPLAY ALIGN. Then pressing ENTER shows the errors in azimuth and altitude.
Credit Celestron.com
Wednesday, October 27, 2010
Tuesday, October 19, 2010
Sunday, October 17, 2010
Horsehead Nebula (B33) in Orion.
M45 16th Oct 2010
Saturday, October 16, 2010
Oops!!!
OT: Lechlade & Rupert 1966
Found this today in an antique shop in lovely Lechlade, which is about 10 miles from where I live. Bargain! to add to my collection.

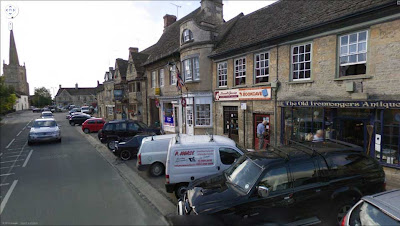


Lechlade has an Xmas shop that is open every day of the year. Shhh!
Friday, October 15, 2010
The Galaxy Zoo
Very interesting talk given by Chris Lintott of the University of Oxford discussing The Galaxy Zoo, an internet-based program for enlisting the help of amateur astronomers in cataloguing other galaxies.
The hills (craters) are alive with the sound of music.
On Sol 2382 (Oct. 6, 2010), Opportunity the rover, covered over 94 meters (308 feet) on her trek to Endeavour crater.
Here's a pan that I created from a few images taken by Opportunity's navigation camera.

Credit NASA
Here's a pan that I created from a few images taken by Opportunity's navigation camera.

Credit NASA
Wednesday, October 13, 2010
Tuesday, October 12, 2010
Subscribe to:
Comments (Atom)


