Showing posts with label M27. Show all posts

Saturday, July 25, 2009

M27 & M57 - 25th July 2009

30 x 30second @800ISO, C9.25, prime focus.

45 x 30second @800ISO, C9.25, prime focus.

Monday, June 22, 2009

M27 20th June 2009

I went out with my Takahashi the other night to do a test of the new focal reducer.
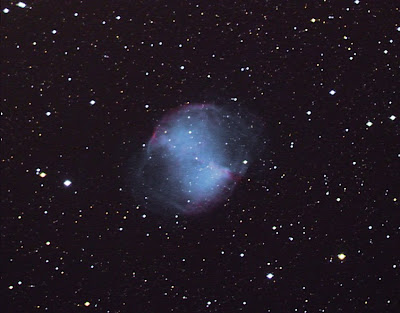
Here is M27, not really a very good subject for a wide field scope, but there are a lot of stars in that area.
This is 19 x 20sec frames @ 800ISO, darks and bias applied, but no flats. I needed a lot more but it clouded over :-(
The focal reducer has cured the star smearing almost, I think the focus could have been a tad better though.

Saturday, July 05, 2008

Dumbbell 4th July 2007

Here's another M27 taken on 4th July, (Happy Birthday Leanne).
This is a DSS combination of the previous set of images taken on the 01/07/08 and a set of 28 x 2minute 1600ISO images taken on the 4th. I polar aligned the scope before taking the images, and therefore I didn't use DEC control in PHD. But there was a very small amount of trailing that I could detect, which had to be removed in PS using layering. Because of this the results are not quite as good as I hoped (the stars look like squashed eggs).
Still you live and learn.
The two set of images were quite a bit out of registration, but DSS matched them up perfectly.

Removing star trails:-
Using PS in layers duplicate the image (called a background copy), next change the background copies blending mode to darken,
with background copy highlighted, select the offset tool in filters
Filters>Other>Offset
(zoom in 500% on the image "Ctrl +") and adjust the horizontal/vertical pixels
(undefined areas set to wrap around).
For the full size picture I used Horizontal of "1" and Vertical of "2"...this will vary depending on the size of the trails and what direction they are heading....i.e. up and down...on a 45....sideways.... etc. ....play with the two settings until the trails are diminished or eliminated....you can use negative numbers.
Once you have the star shape where you want it, zoom back out, then flatten the image and save.
If the filter takes it a tad too far, go to the ..... Edit>Fade filter function and this will decrease the amount. (this must be done before you flattern)....play with it a couple of times.
Credit FWHM IMAGING FORUMS

Tuesday, July 01, 2008

Dumbbell Nebula 1st July 2008


The image at the bottom is a single RAW frame that has been reduced in size and cropped.

Dumbbell capturing.

Here's a screen dump from one of my computer screens (running dual monitors you know, it's the only way to go with all these programs running at once).
This shows the PHD guiding window and graph, on the right is the DSLR shutter program.
The HC Buttons are a handy little scope controller that comes with PHD.

Question: Why that star on the left?
Answer: That's what you're supposed to do, pick a star off centre that isn't too bright. ;-)

Sunday, June 29, 2008

M27 - Dumbbell Nebula - 29th June 2008

It's clear! panic stations, what do I do? what's around? the Dumbbell Nebula!
I didn't have enough subs, (because my corrector plate totally dewed over, I wondered why it was getting dark), but there is something there.
This is 12 frames, totalling 17mins 40s of exposure. No darks, flats or bias. Prime focus C9.25, guided with Push Here Dummy.
M27 is 1,250 Light years away.